What are the QAP global options?

This sections of the Options in this page are in the order they appear in QAP v11.6.3 and more recent (not necessarily in the order displayed in the screen captures of this page). For options of QAP versions older than v10, see this page.

To open the Options dialog box, in the Customize window, select Options and one of the 15 sections of the dialog box in the menu bar (or hit Ctrl + O).

In the General tab

In the Customize Window tab

  • Select if the QAP Customize window is open when QAP is launched.
  • Select if the favorites list and search result list display additional columns with last modification date, creation date and, if the database is enabled, last usage date and usage frequency.
  • Remember the Customize window position (else, the window is centered on the screen).
  • On a multi-monitor system, select if the Customize window is displayed on the active monitor.
  • Select if QAP check if an existing favorite has the same location or content as the saved favorite.
  • Automatically add favorites in Main menu at Top of menu or Bottom of menu when added with Add this Folder or Link, Add this Folder or Link Express and Add favorite from the Explorer context menus.
  • On the right side, set the Search scope to all favorites from the Main menu (default) or search only for favorites under the menu currently displayed in the Customize window.
  • Decide if QAP should use the Windows locale settings when searching for favorites (e.g. “é” considered as “e”).
  • Display the popup menu near the mouse pointer, in the active window or at a fix position.
  • Display the Drives, Recent Folders and Recent Files menus attached or detached from the popup menu.
  • Enable or disable QAP Explorer Context menus (option available only if you installed QAP using the Easy Setup program).
  • Manage the exclusion or inclusion list of applications where the QAP mouse menu trigger is blocked.
  • Use the Get window info button to identify the window to include or exclude.
  • Display keyboard or mouse shortcuts reminders in menu in short or long format. 
  • On the right side, display hotstrings reminders in menu in short or long format.
  • Select the option to use Display Numeric Menu Shortcuts to launch favorites with your keyboard.
  • Set the number of items in the Recent folders and Recent Files menus.
  • Set the maximum number of path levels in Recent/Frequent menus (exceeding levels will be truncated from the beginning)
  • Set the number of items in the Repeat actions menu.
  • Add Close to menus created by QAP allowing to dismiss them if clicking elsewhere does not dismiss them.
  • Display or hide menu icons, and choose menu icons size.
  • Override default document icons with your own custom icons.
  • Set replacement icons for the standard QAP icon.
  • Set a custom icon for Link favorites (used instead of the default browser’s icon)

In the Alternative Hotkeys tab

  • Set mouse or keyboard shortcuts, and keyboard modifiers for Alternative menu features.
  • Use the Reset default modifiers to restore the initial settings.

In the File Managers tab

  • Keep the default file manager Windows Explorer or enable support for Directory OpusTotal Commander or Universal file manager support. After you selected your preferred file manager, fill the additional options as shown below for your file manager.
  • When opening the QAP menu by clicking outside of the Preferred File Manager window (or when another window than this file manager is active), set if you QAP opens the folders in a new window (default) or in the current (or last used) Preferred File Manager window.

In the Snippets and Hotstrings tab

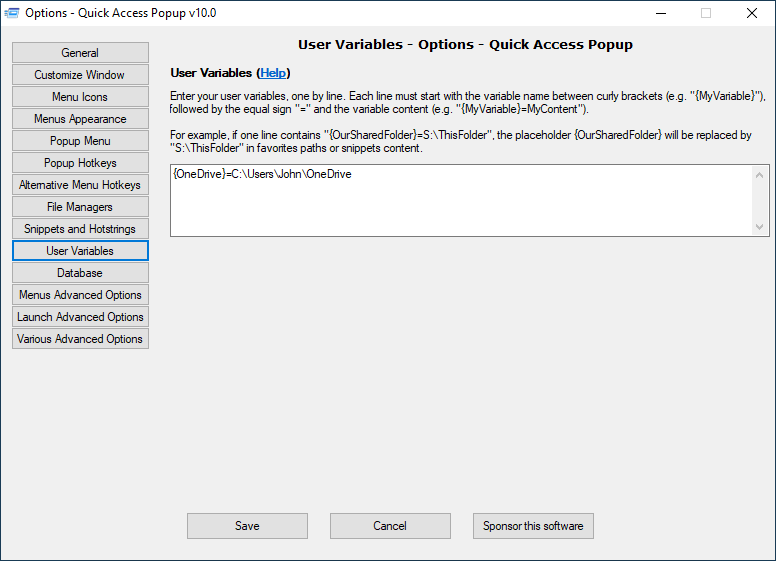
In the User Variables tab

In the Database tab

  • Enable or disable the database collecting info from the Recent Items Windows special folder to build the Frequent Folders, Frequent FilesRecent Folders and Recent Files menus and to accelerate the refresh of some dynamic menus.
  • Set the database refresh interval, the number of days considered in the Frequent menus, and maximum size of the database.
  • Flush the content of the database.
  • Show or not a frequency indicator for folders and files in menus and in the Customize window.
  • Select where the QAP menu bar is displayed.
  • Enable automatic refresh of the Shared menus and Live folders menus and set its refresh frequency.
  • Open the menu when hitting the QAP menu trigger on the Windows taskbar.
  • Avoid having the Clipboard menu refreshed if its size exceeds a certain limit.
  • Set the maximum number of items in the Live Folders of your menu.
  • Show the Switch Settings file and Switch to default Settings file menu items under the File menu.
  • Indicate if network drives can sometimes be offline and indicate the network drive letters.

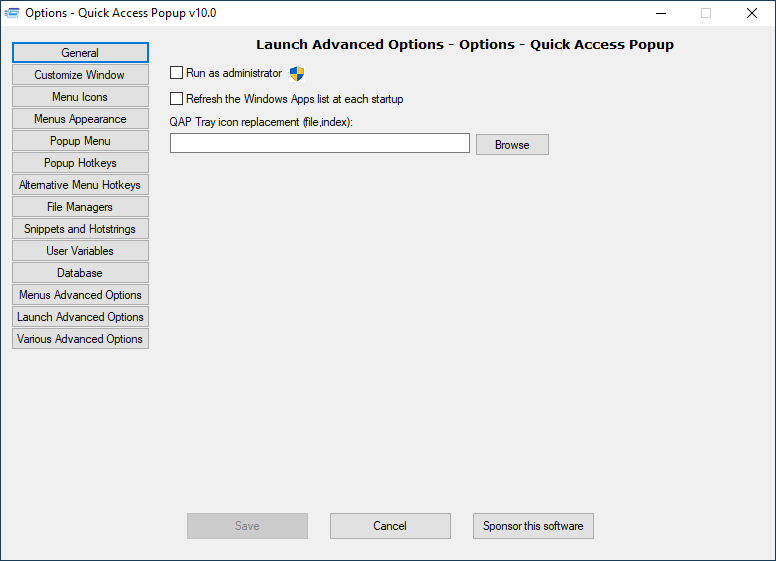
In the Launch Advanced Options tab

  • Run  Quick Access Popup as an administrator.
  • Refresh the Windows Apps list at each QAP startup (if disabled, you can refresh it on demand in the Add Favorite dialog box).
  • Set a replacement for the QAP icon in the Notification zone of the Windows task bar in the “file,index” format, for example C:\Folder\MyFile.exe,1).
In the Various Advanced Options tab

  • Change the delay (in milliseconds) inserted at various steps of the process of changing folder in dialog boxes.
  • Uncheck the Always open Links in new tab or window to navigate a Link favorite in the current browser tab instead of opening the link in a new tab.
  • Enable favorite debugging for placeholders and user variables to display the debug option in Add/Edit Favorites, Basic Settings tab.
  • Keep file name extension when suggesting a name for favorite in Add/Edit Favorites dialog box.
  • Use ASCII codes (ALT+0nnn) when changing folder in Windows Command Line (CMD) or PowerShell for better compatibility for users of international Windows versions (else QAP sends the characters in raw mode).
  • Enable the Shared Menu Catalogue and set in what location Shared menus can easily be added to user’s menu.
  • Change the delays inserted at various steps of Snippets execution (in milliseconds).
  • Set the number of rows in the Manage Icons window (keep zero for the maximum). More info here if the window becomes too large.

How can I make the QAP icon always stay in the Notification Area?

When you run it, Quick Access Popup (QAP) adds an icon in the Notification Area (System Tray) and await your orders. You can click this icon to open the QAP menu.

But icons in the Notification zone have a tendency to fidget and disappear in an obscure sub menu… There is a method to iron the QAP icon in the Notification zone. Follow the instructions for your Windows version:

See also: When do I need to use the QAP icon in the Notifications Area?

Can I use my own documents icons instead of those configured in Windows?

Default document icons shown in QAP menus are normally those configured in Windows. But, starting with QAP v11.5.7, you can override these default icons with your own custom icons. These icons will be displayed in QAP dynamic menus (like Recent Files) and will be suggested as default icons for your new Document favorites.

Each line must start with the type extension (e.g. docx for Microsoft Word), followed by the equal sign “=” and the “file,index” or image file of the default icon. The “file,index” is the path to the file (.ico, .dll or .exe) containing the icon, and the index is the position of the icon in this file, e.g. “C:\Icons\MyFile.dll,1”. You can also use square image files (.png, .bmp, .gif, .jpg) as long as their size is between 16×16 and 64×64 pixels.

You can set the same icon for multiple extensions by joining the extensions using the “+” character. For example:
mp3+wav+acc+aiff=c:\MyIcons\Music.png
xlsx+xlsm=c:\MyIcons\Excel.png

Note: Replacing a custom icon will be immediately reflected in QAP dynamic menus but not in regular favorite documents. To replace the previous custom icon in existing favorites, you can use the Tools, Manage Icons to quickly select the new default icons.

Can I replace the QAP standard menu icons with my own custom icons?

You can replace the standard QAP menu icons with your own custom icons. Open the Options, Menu Icons tab where you can enter a list of custom menu icons replacements. See the list of icon codes below.

In this section of the Options dialog box, you can also set a custom icon for Link favorites that will be used instead of your default browser’s icon.

In the icons replacements text box, enter the QAP menu icon replacements in the text box, one by line. Each line must start with the QAP icon name (e.g. iconFolderLive, as found in the table below), followed by the equal sign “=” and the “file,index” of the replacement icon. The “file,index” is the path to the file containing the icon (.ico, .dll or .exe) and the index is the position of the icon in this file, e.g. “C:\Icons\MyFile.dll,1”. You can also use square image files (.png, .bmp, .gif, .jpg) between 16×16 and 64×64 pixels.

Here is the list of the icons you can replace.

IconPositionQAP icon codeDefault icon
1iconQAP[path]\JLicons.dll,1
2iconAbout[path]\JLicons.dll,2
3iconAddThisFolder[path]\JLicons.dll,3
4iconApplication[path]\JLicons.dll,4
5iconCDROM[path]\JLicons.dll,5
6iconChangeFolder[path]\JLicons.dll,6
7iconClipboard[path]\JLicons.dll,7
8iconClose[path]\JLicons.dll,8
9iconControlPanel[path]\JLicons.dll,9
10iconCurrentFolders[path]\JLicons.dll,10
11iconDesktop[path]\JLicons.dll,11
12iconDocuments[path]\JLicons.dll,12
13iconDonate[path]\JLicons.dll,13
14iconDownloads[path]\JLicons.dll,14
15iconDrives[path]\JLicons.dll,15
16iconEditFavorite[path]\JLicons.dll,16
17iconExit[path]\JLicons.dll,17
18iconFavorites[path]\JLicons.dll,18
19iconFolder[path]\JLicons.dll,19
20iconFonts[path]\JLicons.dll,20
21iconFTP[path]\JLicons.dll,21
22iconGroup[path]\JLicons.dll,22
23iconHelp[path]\JLicons.dll,23
24iconHistory[path]\JLicons.dll,24
25iconHotkeys[path]\JLicons.dll,25
26iconAddFavorite[path]\JLicons.dll,26
27iconMyComputer[path]\JLicons.dll,27
28iconMyMusic[path]\JLicons.dll,28
29iconMyVideo[path]\JLicons.dll,29
30iconNetwork[path]\JLicons.dll,30
31iconNetworkNeighborhood[path]\JLicons.dll,31
32iconNoContent[path]\JLicons.dll,32
33iconOptions[path]\JLicons.dll,33
34iconPictures[path]\JLicons.dll,34
35iconRAMDisk[path]\JLicons.dll,35
36iconRecentFolders[path]\JLicons.dll,36
37iconRecycleBin[path]\JLicons.dll,37
38iconReload[path]\JLicons.dll,38
39iconRemovable[path]\JLicons.dll,39
40iconSettings[path]\JLicons.dll,40
41iconSpecialFolders[path]\JLicons.dll,41
42iconSubmenu[path]\JLicons.dll,42
43iconSwitch[path]\JLicons.dll,43
44iconTemplates[path]\JLicons.dll,44
45iconTemporary[path]\JLicons.dll,45
46iconTextDocument[path]\JLicons.dll,46
47iconUnknown[path]\JLicons.dll,47
48iconWinver[path]\JLicons.dll,48
49iconFolderLive[path]\JLicons.dll,49
50iconIcons[path]\JLicons.dll,50
51iconPaste[path]\JLicons.dll,51
52iconPasteSpecial[path]\JLicons.dll,52
53iconNoIcon[path]\JLicons.dll,53
54iconUAClogo[path]\JLicons.dll,54
55iconQAPadmin[path]\JLicons.dll,55
56iconQAPadminBeta[path]\JLicons.dll,56
57iconQAPadminDev[path]\JLicons.dll,57
58iconQAPbeta[path]\JLicons.dll,58
59iconQAPdev[path]\JLicons.dll,59
60iconQAPloading[path]\JLicons.dll,60
61iconFolderLiveOpened[path]\JLicons.dll,61
62iconSortAlphaAsc[path]\JLicons.dll,62
63iconSortAlphaDesc[path]\JLicons.dll,63
64iconSortNumAsc[path]\JLicons.dll,64
65iconSortNumDesc[path]\JLicons.dll,65
66iconQAC[path]\JLicons.dll,66
67iconQACadmin[path]\JLicons.dll,67
68iconQACadminBeta[path]\JLicons.dll,68
69iconQACadminDev[path]\JLicons.dll,69
70iconQACbeta[path]\JLicons.dll,70
71iconQACdev[path]\JLicons.dll,71
72iconQuickLaunch[path]\JLicons.dll,72
73iconWatch[path]\JLicons.dll,73
74iconClipboardCheck[path]\JLicons.dll,74
75iconClipboardList[path]\JLicons.dll,75
76iconProcessCircle[path]\JLicons.dll,76
77iconSystemInfo[path]\JLicons.dll,77
78iconChecked[path]\JLicons.dll,78
79iconMagnify[path]\JLicons.dll,79
80iconNotebook[path]\JLicons.dll,80

Icons by: Icons8

Can I schedule automatic menu refresh for Live folders and Shared menus?

Yes. In Options, Menus Advanced Options tab, check the Enable Scheduled QAP Menu Refresh option. This options refreshes the Live Folders menu and the Shared menus. Set the interval between each refresh (in seconds). Keep in mind that the refresh momentarily disables the popup menu. Minimum interval is 30 seconds and recommended interval is 300 seconds (5 minutes) or more.

The check box Beep before and after refresh enables a short beep that is played at the beginning and the end of the refresh interruption. This helps decide at what frequency schedule the refresh. Do not forget to turn this off when you are set.


Where is the QAP settings folder (also known as “working directory”)?

The Settings Folder (called “Working Directory” in v9 and before) is the folder where the QAP settings files (QuickAccessPopup.ini and QAP_Frequent.DB) are saved and updated.

Open the Settings folder

Normally, you would not need to open this folder. But if you want to backup its content or to move it to a new computer, you can open this folder by selecting File, Open QAP Settings Folder in the Customize window menu bar (under QAP v9 or earlier, right-click the QAP icon in the Notification zone and select Open QAP working directory).

Location of the Settings Folder if you installed QAP with Easy Setup installation (EXE file)

If you installed QAP using the “one-step installation” procedure using the EXE setup file, the Settings Folder is:

  • for new v10 installations: [user folder]\Documents\Quick Access Popup
    (for example, C:\Users\Jean\Documents\Quick Access Popup)
  • if you first installed QAP with v9 or earlier, the settings folder is
    [user folder]\AppData\Roaming\Quick Access Popup
    (for example, C:\Users\Jean\AppData\Roaming\Quick Access Popup).
Location of the Settings Folder if you are running in Portable mode (ZIP file)

If you preferred the portable installation, by default the Settings Folder is where the QuickAccessPopup.exe program is running.

See also: Can I change the location of my QAP settings folder?

Can I change the location of my QAP settings folder?

Yes, with QAP v10 (or more recent), if you installed QAP with the Easy Setup file. See below if you choose to install with the Portable ZIP file. See also: Where is the QAP settings folder (also known as “working directory”)?

You can change the Settings folder in Options, General tab. Select the new folder in the Settings Folder text box and click Save.

When saving the new location, QAP asks why you want to change the Settings Folder location.

  • If you want to copy your current settings to a new location and run QAP from this location in the future, select Copy.
  • If you want to use the setting already found in this new location when QAP will be restarted, click New. If this location does not contain QAP settings (namely, the quickaccesspopup.ini file), new settings files will be created in this folder.

In both cases, the settings files in the original (old) folder are not deleted. Remove them at your convenience after you completed the operation at your satisfaction.

Location of the Settings Folder if you are running in Portable mode (ZIP file)

If you preferred the portable installation, by default the Settings Folder is where the QuickAccessPopup.exe program is running.

In this type of installation, you can set a different Settings Folder by editing the QAP shortcut in the Startup folder (or create your own shortcut) and set the QAP Settings Folder directory in the Start in: field of the shortcut.

Alternatively, you could also set the Settings Folder using a the “/Working:” command-line parameter. For example:

C:\MyFolder\QuickAccessPopup.exe /Working:C:\MySettings

The “/Working:” parameter can be set at the command line, in a Windows file shortcut or in the current user registry Run key for Quick Access Popup.

This parameter has precedence on the Settings Folder value in the Options, General tab.

Can I block the QAP menu trigger (Middle Mouse Button) if it interfere with one of my other apps?

Yes. There may be some applications where the user does not want the QAP menu mouse trigger (by default, Middle Mouse Button) to interfere with the app’s normal behavior. QAP allows to block the QAP mouse menu based on the window title, window class or process name.

But, before considering blocking hotkeys, you could first see if another hotkey would best fit your needs. If yes, use the Options window, tab Popup Hotkeys to select different triggers for the QAP menu.

If you prefer the exclusion approach, open the Popup Menu tab in the Options. In the Mouse trigger Blacklist or Whitelist text zone, select the exclusion (Blacklist) or inclusion (Whitelist) approach and enter any part of the window title of the application to exclude or include (the window title is what appears in the top horizontal bar of the window). You can enter multiple exclusions, one per line.


For example, to exclude Google Chrome and Microsoft Word applications, select Blacklist and enter the following two lines in the exclusion list:

Google Chrome
Microsoft Word

Click Save and try the to open the menu again in these windows. The menu won’t show up. The QAP hotkey is disabled and the Middle Mouse Button click is sent to the target window as if QAP was not running.

Excluding dialog boxes

By default, QAP will only block the mouse hotkey in the app’s main window. You can also disable the mouse hotkey in app’s dialog boxes by adding the prefix * (asterisk) to the title or the class name, for example:

*3D Studio

In this example, the mouse hotkey will be blocked in both the 3D Studio Max main window and in its dialog boxes.

To be more specific

Using this technique, there may be situation where a window title in another app could include one of the exclusion strings you entered. For example, if you save a file in Notepad under the name “My Microsoft Word tips and tricks.txt”, this window would be excluded because it includes the string “Microsoft Word”. But you can be more specific with this:

- Microsoft Word

Adding the dash and space at the beginning of the string will exclude Word windows because the app name in the Word’s title bar is always preceded by the document name and a dash between spaces.

To be a bit more technical

Another way to be more specific is to enter part of the app’s “window class name”. For example, Word’s windows class name is “OpusApp” and Chrome’ windows class name is “Chrome_WidgetWin”. So, these two exclusion lines could be:

Chrome_WidgetWin
OpusApp

You can also exclude an application based on its process name. This is a solution for applications having variable class names. Usually, the process name is the file name of the application’s executable file, for example the Chrome process name is “chrome.exe” and the Word process name is “winword.exe”. So, the exclusions list could also be:

winword.exe
chrome.exe

How can I find a window class name, process name or a window title if the app has no title bar?

To identify the window you want to exclude, use the Get window info button at the bottom of the Exclusions list in the Options dialog box. It will prompt you to click in the target window with the QAP menu hotkey (Middle Mouse Button) and will copy the window title, class name and process name in your Clipboard. Paste this info in the exclusion list and edit it to remove unnecessary parts as described above.


There are other tools to gather more info about windows. I recommend this freeware utility: WinLister by NirSoft.

To block other QAP keyboard shortcuts, see also: Can I block the QAP keyboard shortcuts if they interfere with one of my apps?

Can I block the QAP keyboard shortcuts if they interfere with one of my apps?

Yes. There may be some applications where the user does not want the QAP favorites keyboard hotkeys to interfere with the app’s normal behavior. QAP allows to block its hotkeys based on other app’s the window title, window class or process name.

Under Options, Launch Advanced Options, you can list the applications where QAP will disable (Block) all its favorites keyboard shortcuts: favorites shortcuts and Alternative menus features shortcuts. When the shortcuts are not allowed on an application, they are sent to the target window as if QAP was not running.

Note 1: This option does not affect the Main and Alternative menus keyboard shortcuts and the Main menu mouse trigger (see this page to block the Main menu mouse trigger).

Note 2: You can also do the opposite and select the only applications where the keyboard shortcuts will be allowed by clicking the Approved radio button. In the following explanation, we assume that you kept the Blocked option.

To add an application to the list, enter any part of the its window title. You can enter multiple applications, one per line. In the example above, QAP hotkeys will be inactive in any window including the name Resolve. You can also add applications by their class name or process name (EXE file name). In the example, the application Photoshop Elements having the executable file PhotoshopElementsEditor.exe will run with QAP hotkeys disabled.

See also Can I block the QAP menu trigger (Middle Mouse Button) if it interfere with one of my other apps?

Does QAP support Windows dark mode?

Yes. You can enable QAP dark mode support in Options, General. When this option is enabled and Windows colors personalization for applications is set to Dark, QAP menus will be displayed with white text on black background. The QAP Customize windows will also be displayed with dark background after you restart QAP. At this time, not all QAP dialog boxes support dark mode.

Note 1: When using dark mode, the QAP Theme (also in Options, General) is automatically set to Windows.

Note 2: Know issue… Menu having multiple columns (using the column break in your QAP menu), do not obey the command that sets the dark mode. See this example.

Can I change the colors of the Customize window or the popup menu?

You can choose Quick Access Popup colors for Customize window and other dialog boxes. You can also change the popup menu background color (see About menu colors, below).

Note: QAP Theme colors are not supported when using the Windows Dark Mode. See: Does QAP support Windows dark mode?

Colors are managed using “themes”. The available themes are listed in the Options dialog box, General tab. Themes can be edited or added in the QAP settings file. Here are the instructions if you want to edit or add themes.

1) Open the quickaccesspopup.ini file

See How can I edit the file QuickAccessPopup.ini?

2) Add the code for the new theme

At the end of the .ini file, add your theme following this syntax:

[Gui-New Theme]
WindowColor=E0E0E0
TextColor=000000
ListviewBackground=FFFFFF
ListviewText=000000
MenuBackgroundColor=FFFFFF

Replace “New Theme” with a name of your choice (use only letters, numbers and spaces – no special characters) and color codes with your own colors. You can use this color picker to select your colors.

3) Under the [Global] ini file section, update the list of themes offered in the Options window:

AvailableThemes=Grey|Yellow|Light Blue|Light Red|Light Green|New Theme

Again, replace “New Theme” with the name of the new theme (exact same name as in step 2).

4) Choose your new theme

Save the QuickAccessPopup.ini file and restart Quick Access Popup. Select your theme in the Options dialog box, General tab. That’s it!

About menu colors
Color management capabilities are limited by QAP’s development framework. Especially for menu background color (the MenuBackgroundColor value above), note that the color of menu text cannot be changed. Since the text must stay black, dark color background should be avoided for menus. Also, the background color behind menu icons cannot be changed.

Why these limitations? QAP could offer more flexibility. But this would be done at the cost of completely redrawing menus instead of using the standard basic Windows command to build menus. This is not in my plan to do it.

About Windows themes
QAP themes has been designed with the “normal” Windows theme (as selected in Windows SettingsPersonalisationThemes). QAP themes may not work well with some Windows themes. If you use Windows themes, you should choose the QAP theme named Windows that will not interfere with Windows themes

How can I control how the Frequent Items database works?

Setting up the Frequent Items database

The first time QAP is launched, it installs the SQLite files required to collect data about your Windows and QAP usage. These files are saved in the same folder where is installed the Quick Access Popup executable file.

A database named QAP_Frequent.DB is then created in the QAP settings folder. Periodically (by default every minute), QAP stores in this database the Recent Items collected from Windows since the last update. This very light background process is unnoticeable from a performance point of view.

QAP also logs in this database your QAP menu usage. It allows to track recent folders open in QAP that would not be added to the Windows Recent Items. With QAP v11 (or more recent), the database is also used to suggest items in the Add Multiple Favorite command.

For more curious and technical users wishing to browse this database, I recommend the use of the free app SQLite Browser (this tool is not required for normal users).

Configuring the Frequent Items database

You can set the parameters of the Frequent Items database in Options. Under the Database tab, you can enable or disable the database. If is is disabled, the Frequent Folders and Frequent Files menus will be empty (you can remove them in the Customize window).


When enabled, the database is refreshed by default every 60 seconds. You can change this under Collection and refresh interval (seconds).

You can also set the period considered when building the Frequent menus. For example, if you would like to see your most used items in the last week, set the Number of days to take into account in Frequent Items menus to 7. By default, the period is of 30 days. You can also increase it if you prefer to see your long term most used items.

By default the database size is limited to 3 MB. This should be enough for 30 days of normal use of QAP. But if you are an intensive user or if you wish to keep a longer period, increase this size. There is no limit to the number of days or size of the database. When the size limit is exceeded, oldest items are removed until the maximal size is respected.

If you would like to see the ranking of items in the Frequent menus, enable the Show frequency index in “Customize” window and menus. This will show that value for each item in the menus and also in the Customize window for item found in the database.

Finally, if, for privacy or any other reason, you want to delete the database content, click the Flush Frequent Items from database button. This will delete all items from the database. After you restart QAP, the Frequent and Recent items menus will be empty. If you keep the database enabled, these menus will be repopulated as new contents from the Windows Recent Items will be added, starting at the time of the last collection.

If files in the database goes offline

If you sometimes have offline network files in your Recent Items Windows folder (for example, if your portable computer is attached to network drives at work but not when you are outside office), see the recommendations about network drives.

What if the Recent menus remains empty?

The Recent Folders and Recent Files menus are populated from the Windows Recent Items folder. Check if you have recent folders and files in this system folder:

C:\Users\Username\AppData\Roaming\Microsoft\Windows\Recent
(replace “Username” with your own user name)
or enter
%APPDATA%\Microsoft\Windows\Recent Items

If this folder is empty (or outdated), enable it in Window Settings. See instructions on one of these pages: for Windows 10 or Windows 7.

How does QAP work on multi-monitor systems?

When QAP detects that it is running on a dual or multi-monitor system, it adjusts it behavior in two ways.

Open new Windows Explorer windows on active monitor

(This post applies to QAP v9.3.2 and more recent.)

When the option On a multi-monitor system, always open the Explorer window on the active monitor is checked and QAP detects that it is running on a dual or multi-monitor system, it will open the new Explorer windows at the center of the active monitor.

QAP determines which monitor is the active monitor in one of the following ways:

  • if the QAP menu was open using the mouse trigger (for example, the default Middle Mouse Button), it will open the Explorer window on the monitor where the mouse pointer was positioned when the menu was open;
  • if the menu was open using the keyboard trigger (by default Windows + W) or if the favorite was launched using a keyboard shortcut, QAP will open the Explorer window on the monitor where is located the currently active application window.

Note for Directory Opus users: DOpus offers an option that will make new listers to be opened on the active monitor. Search for Default Lister Positioning in the DOpus options window.

Settings windows

(This post applies to QAP v9.3.1 and more recent.)

If the option Remember Settings window position is checked, QAP will reopen its Settings window at the last position you moved it in the current or last session. However, it the screen configuration has changed (you added/removed a monitor, changed a monitor resolution or selected a different primary monitor), QAP will reset it Settings window position to the center of the primary monitor. This will prevent the Settings window to be restored on a monitor or screen region that is no longer visible.

Also, all secondary settings windows (Options, Select favorite type, Add/Edit/Copy/Move Favorite, Add Shared menu from catalogue, Manage Hotkeys, Manage Icons, About, Donate and Help) are now always positioned on top of the Settings window. In addition, QAP will remember the width of the Add/Edit/Copy/Move Favorite windows in order to allow very long Parent menu names to be fully displayed.